In this tutorial, we will walk you through the installation of Visual Studio Code.
Step 1. Install Visual Studio Code
Goto VS Code releases, download the appropriate version for your os and archietecture.
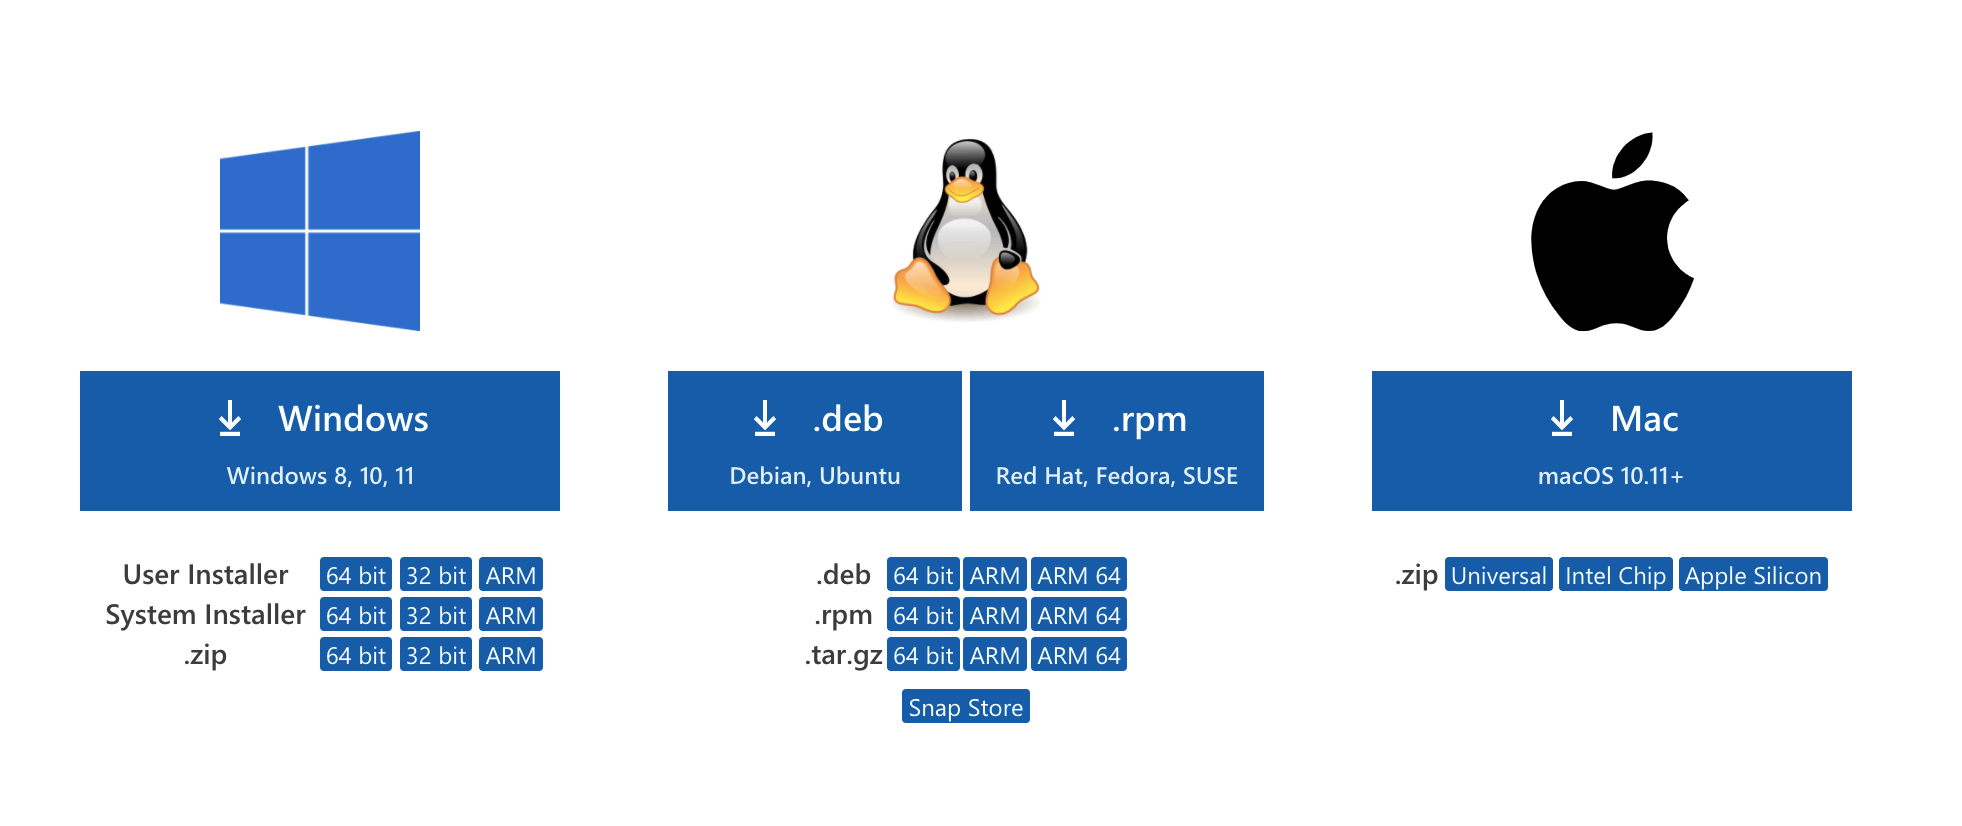
- Download
Windowsif your os is Windows 8, 10, 11 - Download
Macif your os is macOX 10.11+
Open the installer you just download, it will install Visual Studio Code for you by default. After installation finish, you will find the VS Code Application on your Desktop/Lauchpad.
Step 2: Launch Visual Studio Code
Once the download is complete, let it install the Visual Studio Code on your computer. After it is installed, let’s launch the Visual Studio Code.

Step 3: Open A New File
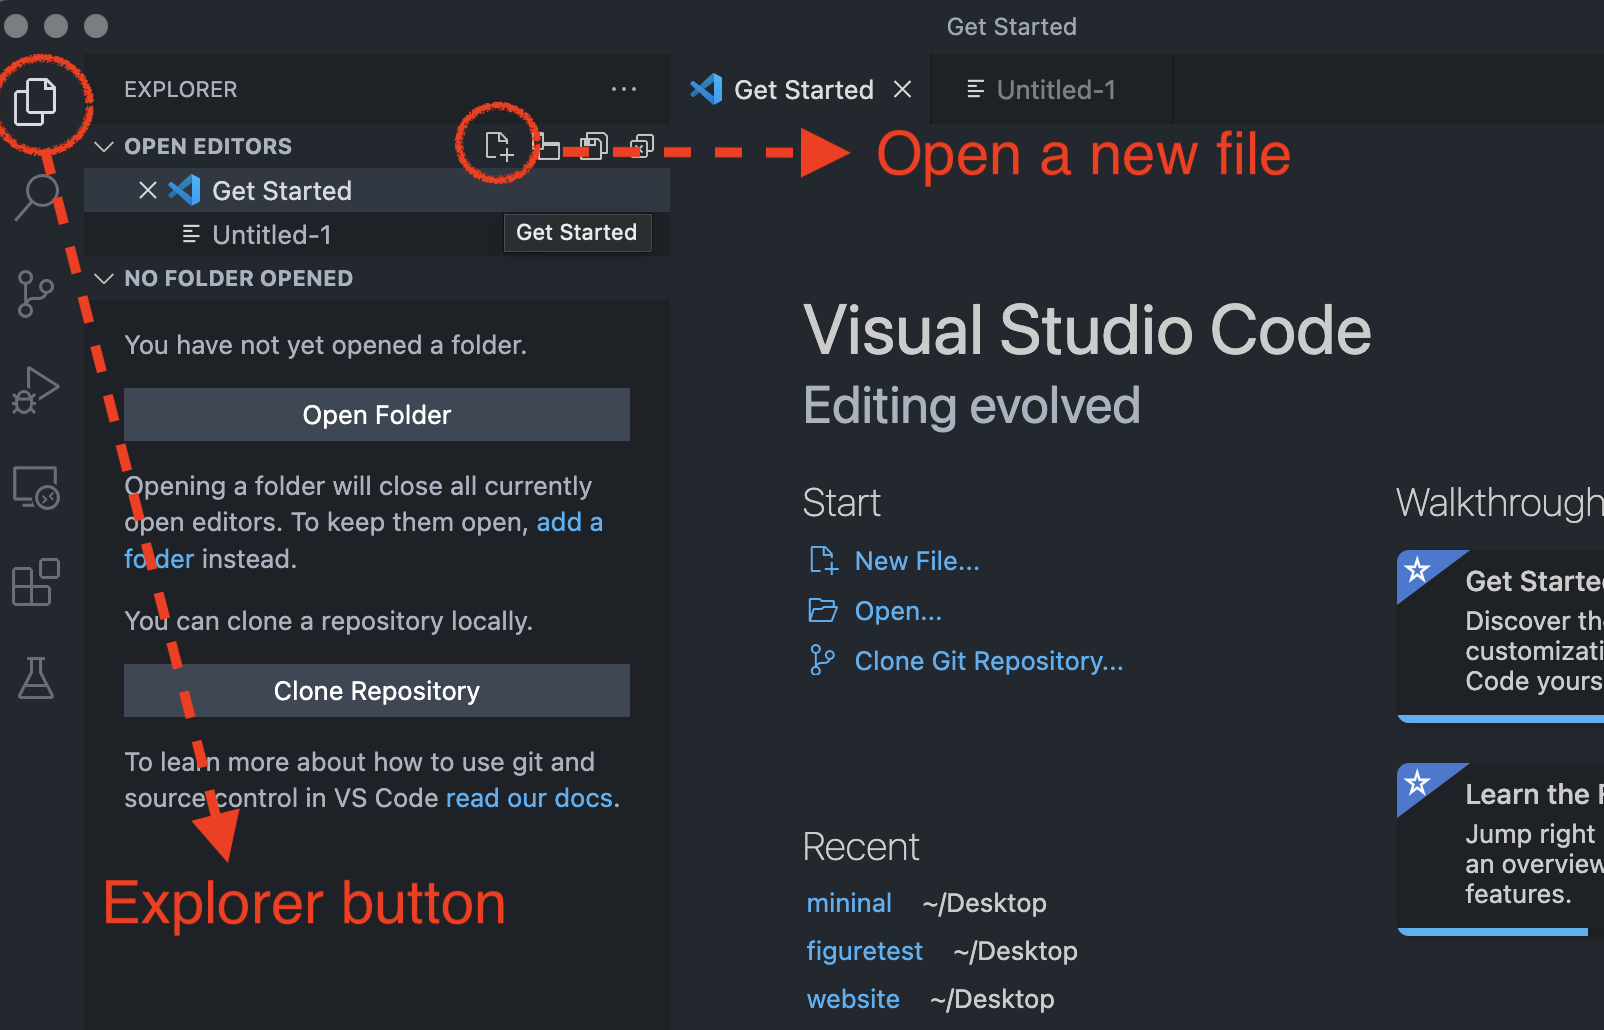
If we want to start with a new file, click the Explorer button the left-hand side then click New file
Then Visual Studio Code will open a new file where you edit with:
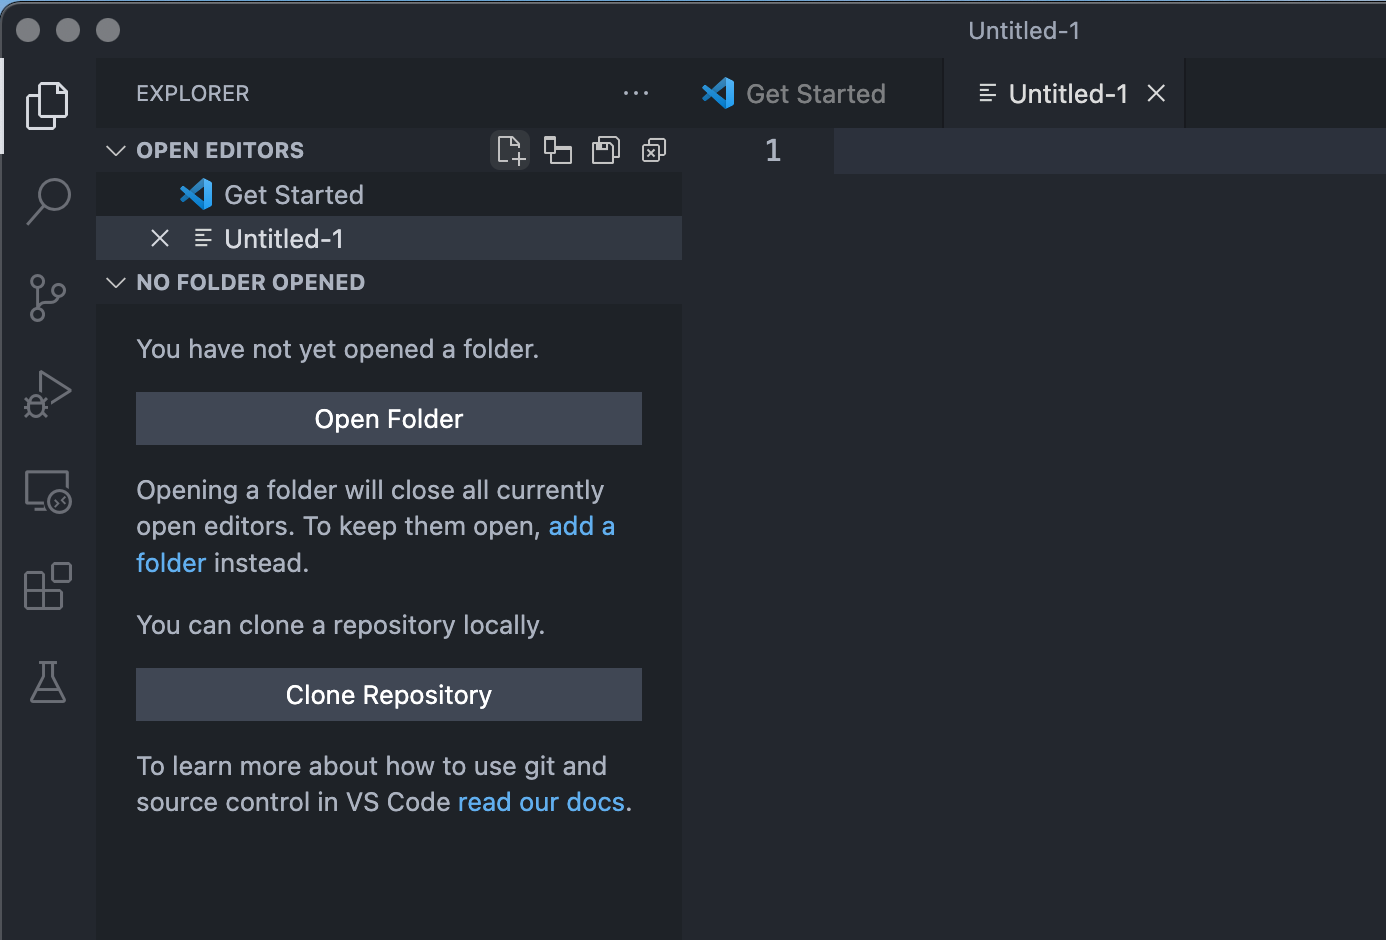
The new file is labelled as untitled, which means the file is not named yet.
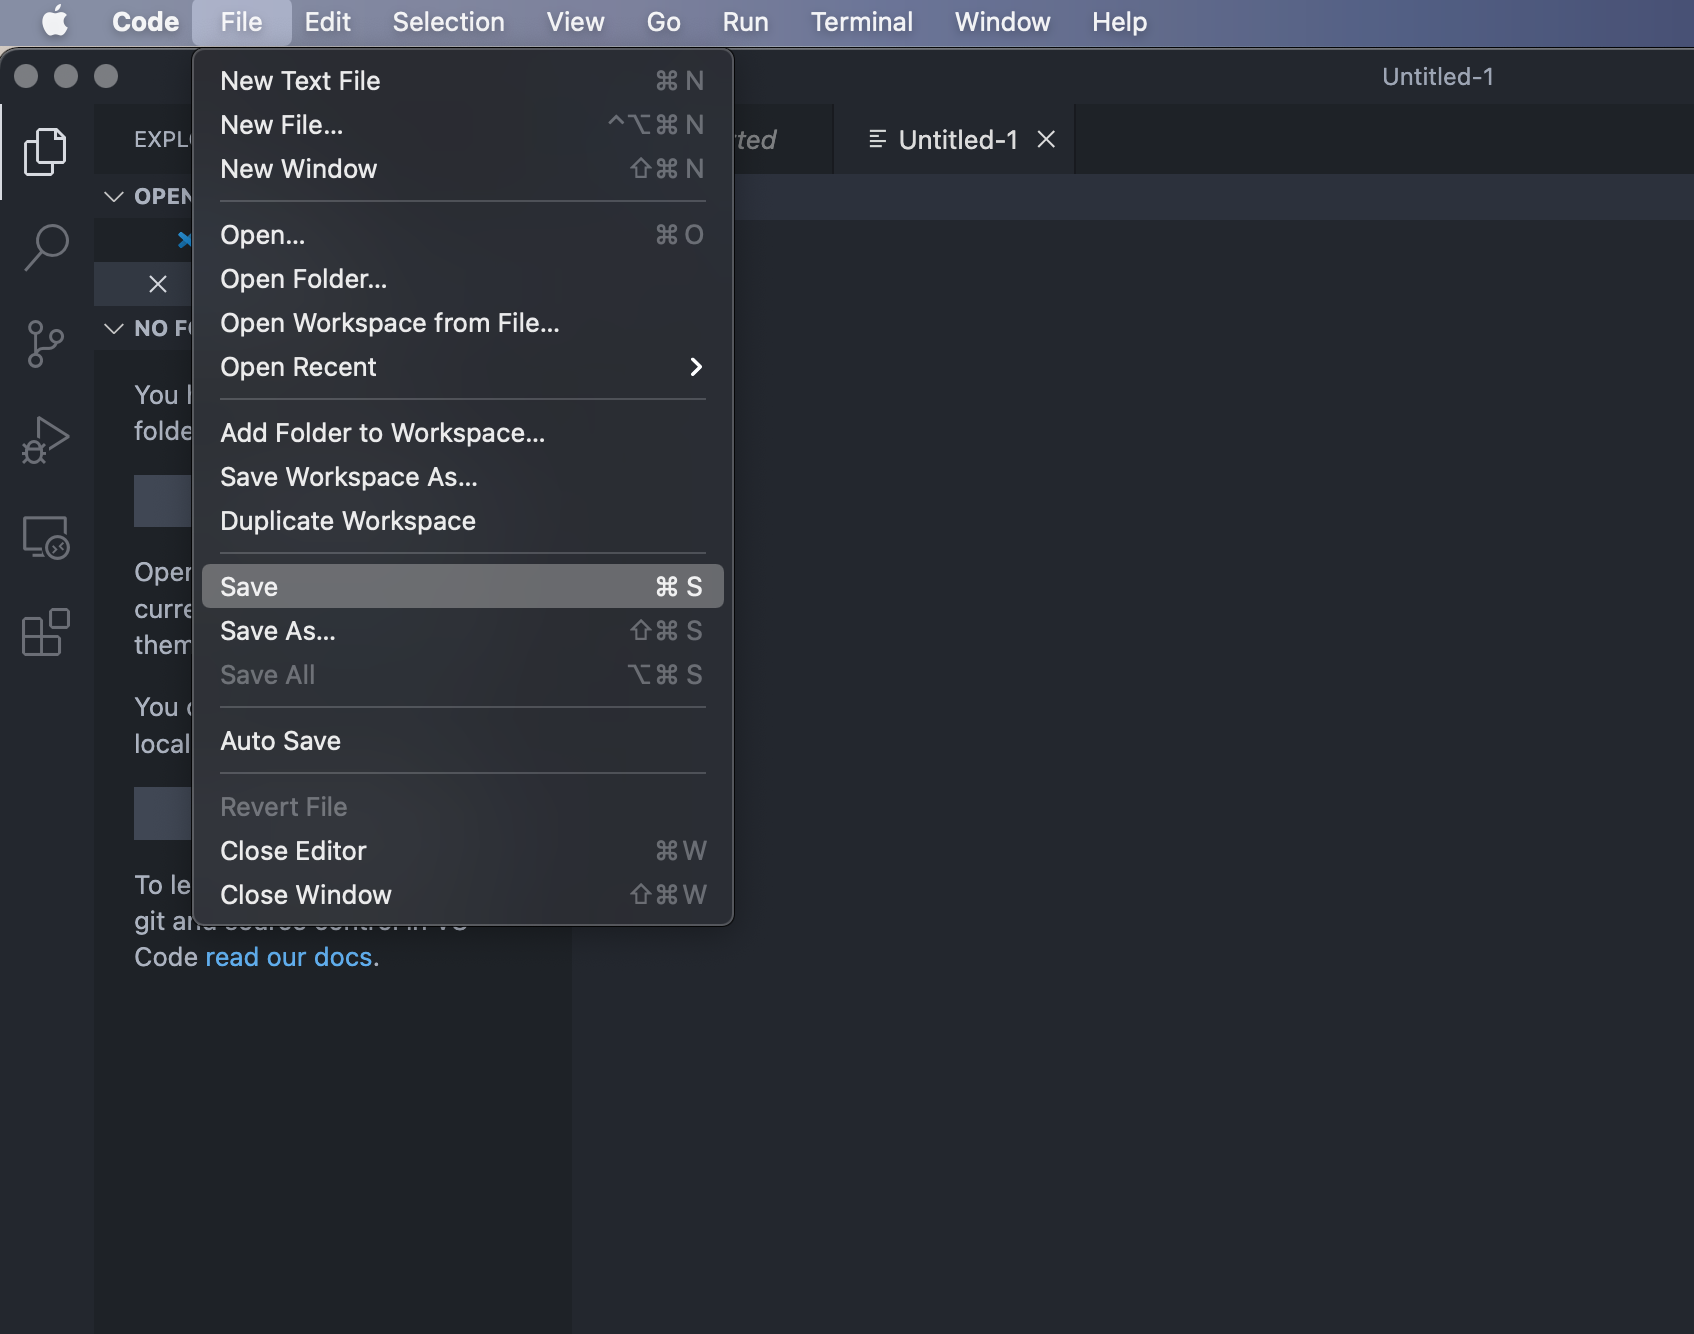
To save the file, you can either save it from the top-level menu with File > Save (as shown in below figure), or by pressing command + s
Step 4: Open A Folder
Visual Studio Code works with folder rather than project.
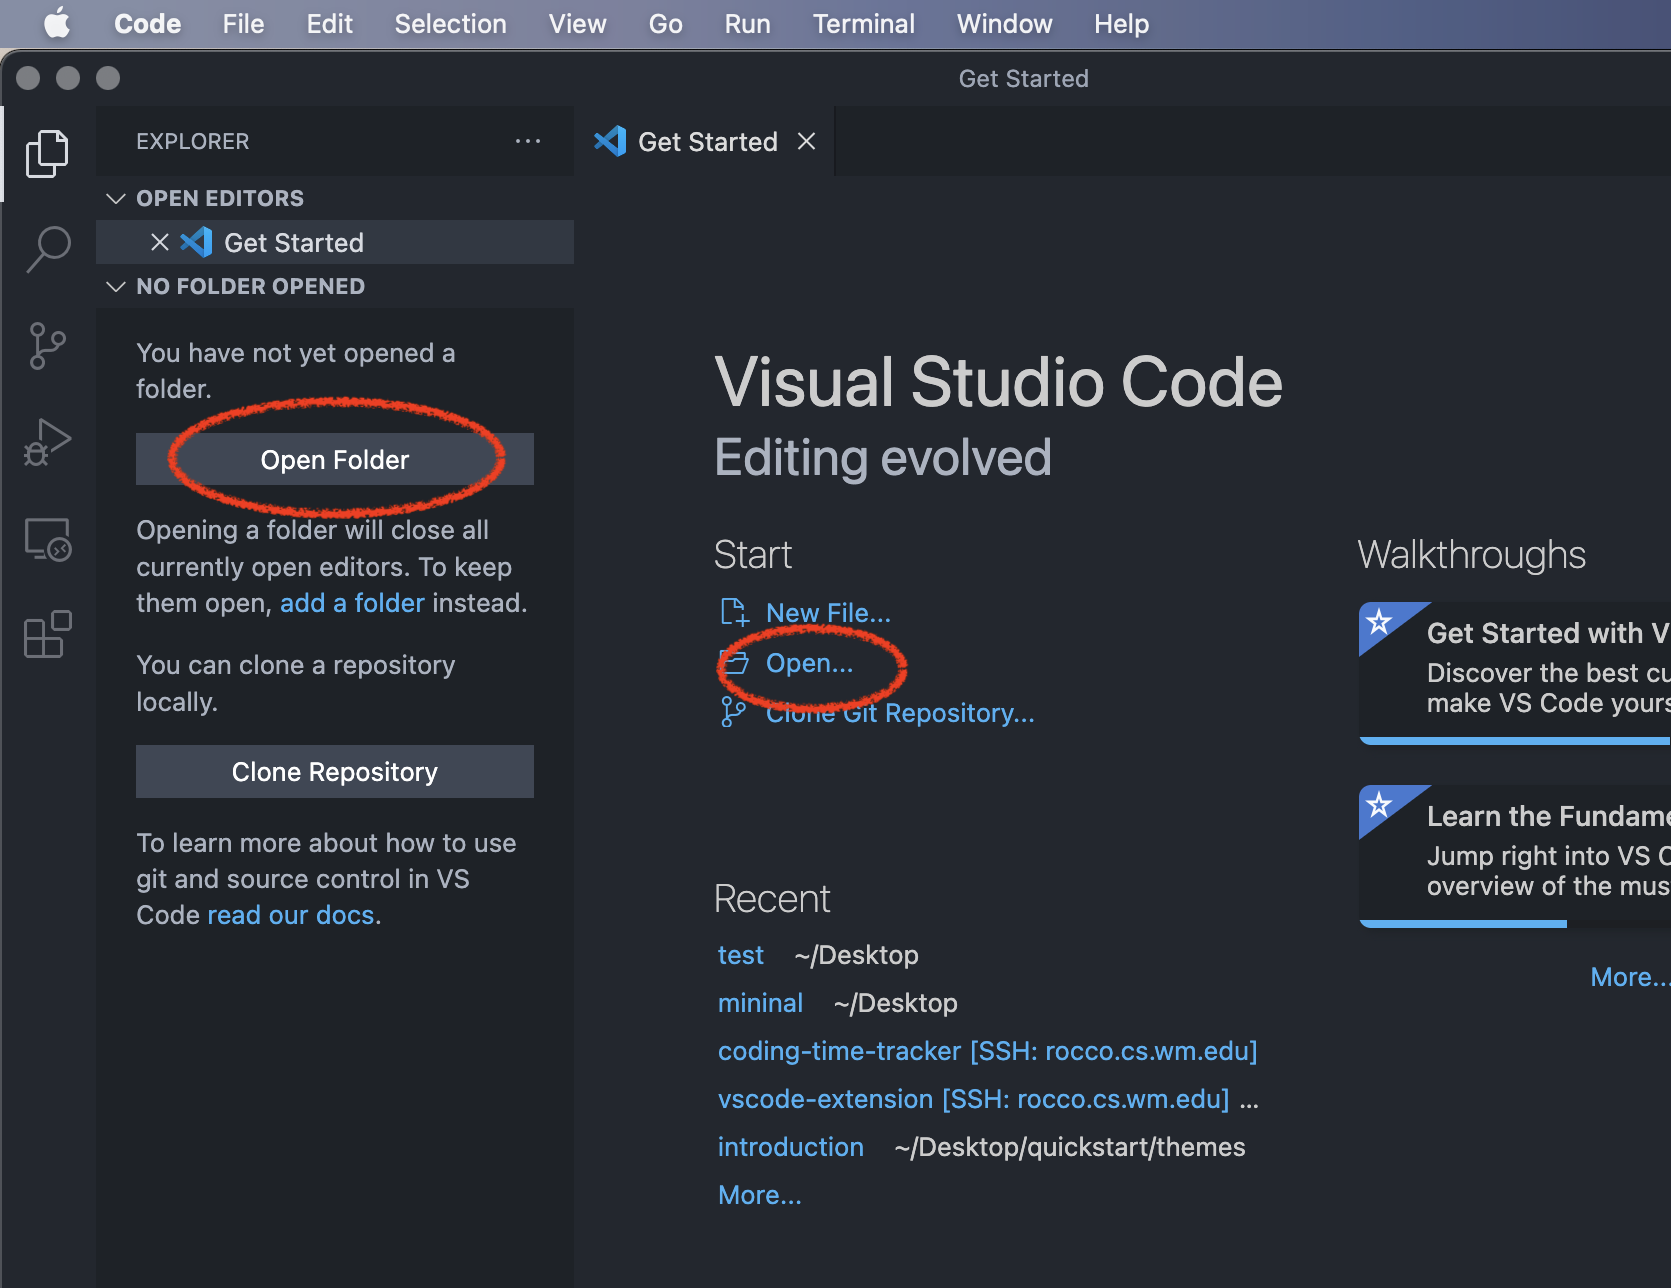
You can either choose to open a new folder, or open an existing folder.

If you open a new folder, there will be nothing there in the created folder. Then you may want to open a new file like step 3.
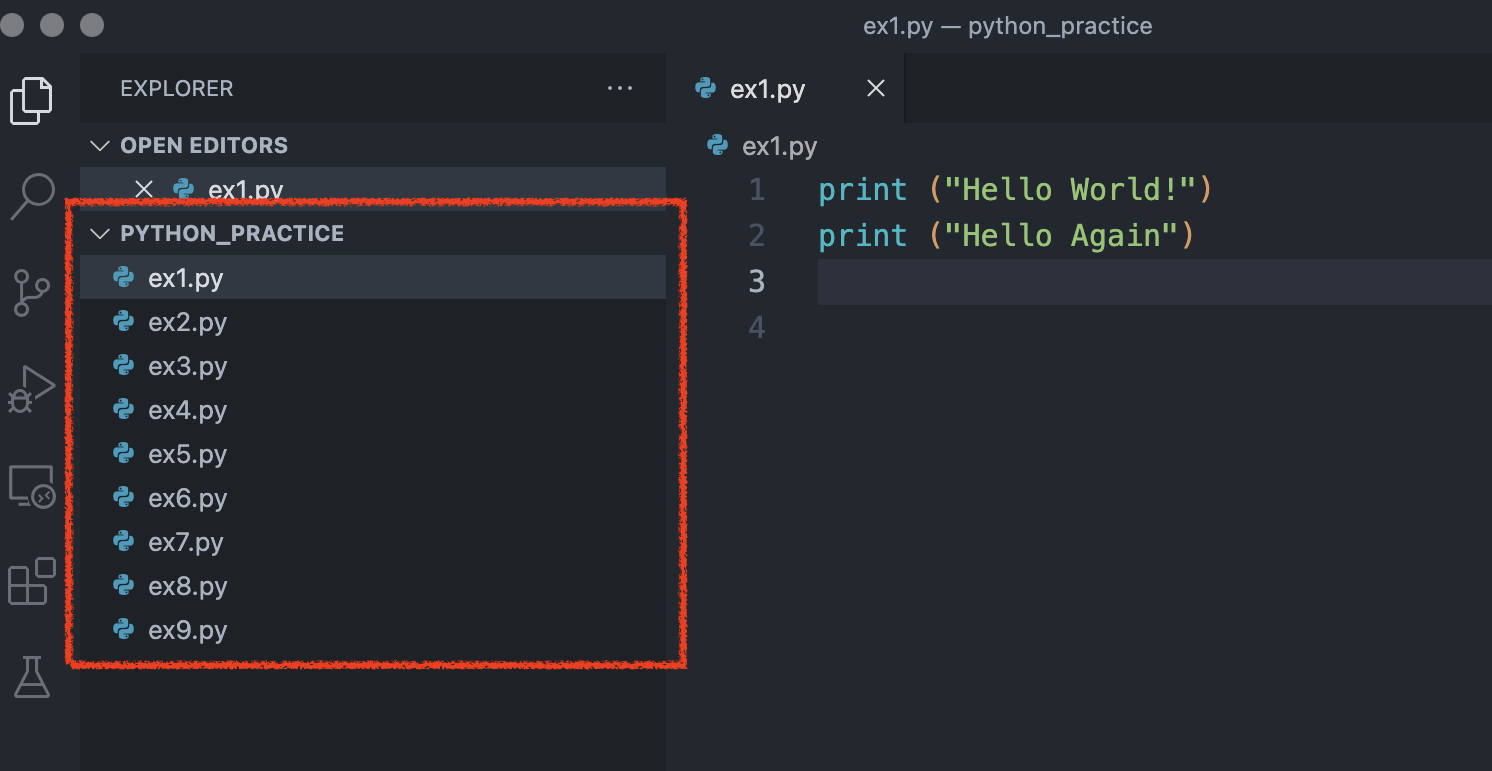
Here we choose to open an existing folder named python_practice. By choose python_practice and click open, Visual Studio Code opens the whole folder, all python files in python_practice are listed in below red box, then you can click the file and open it.