Jupyter Notebooks is an open-source project that combines Markdown text and executable Python source code on one canvas.
In Tutorial 3 we lhave earn how to set up Python enviroment. Once the appropriate environment is activated, we can create and open a Jupyter Notebook.
Step 1: Install Jupyter Notebook Extension
Search Jupyter in extension marketplace:
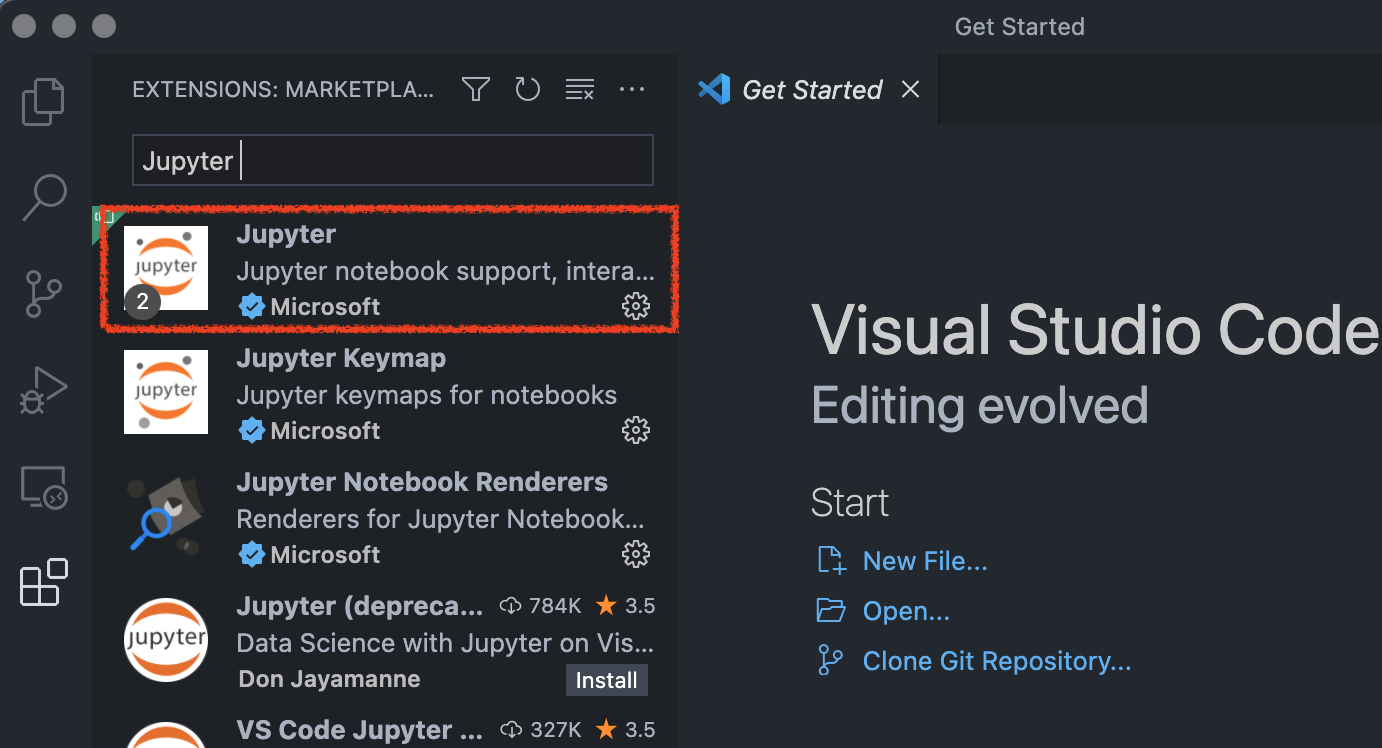
Make sure it is developed by Microsoft, install it.

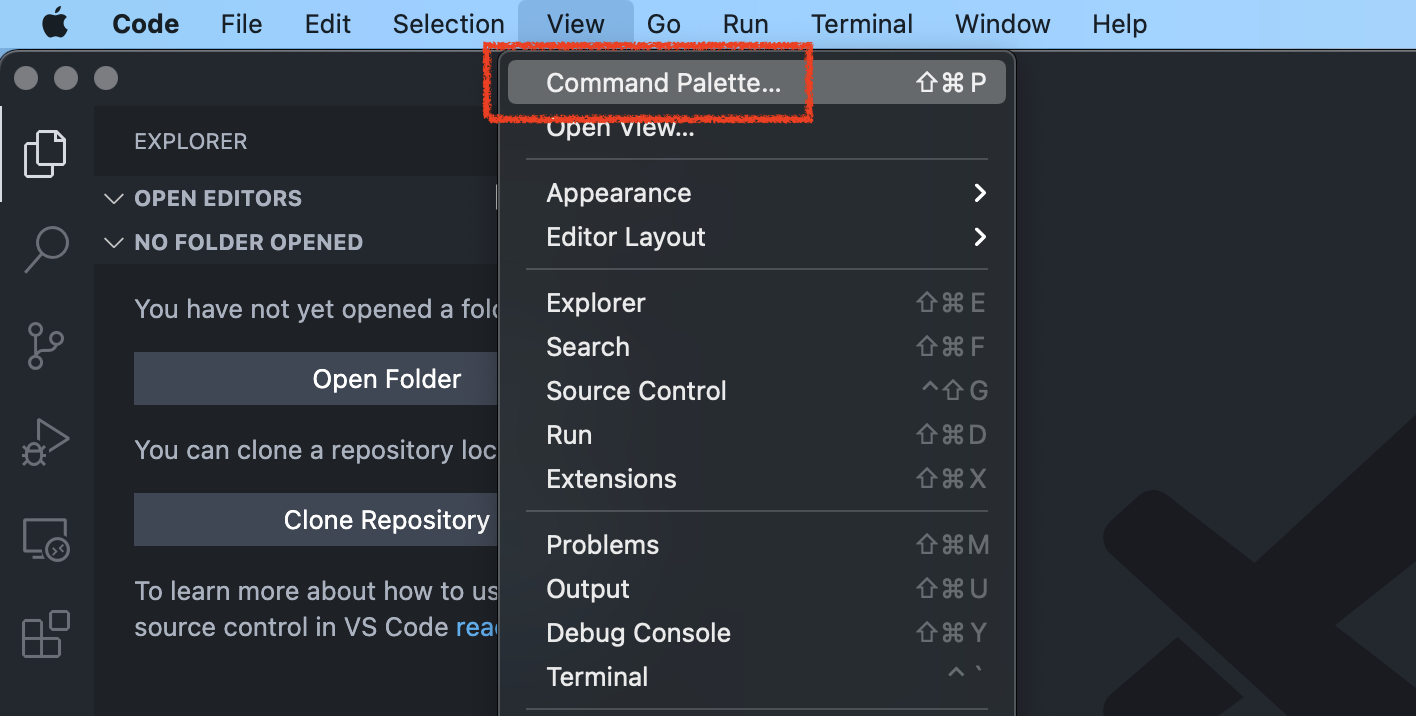
Step 2: Create or Open a Jupyter Notebook
Open the Command Palete in top menu View > Command Palette:
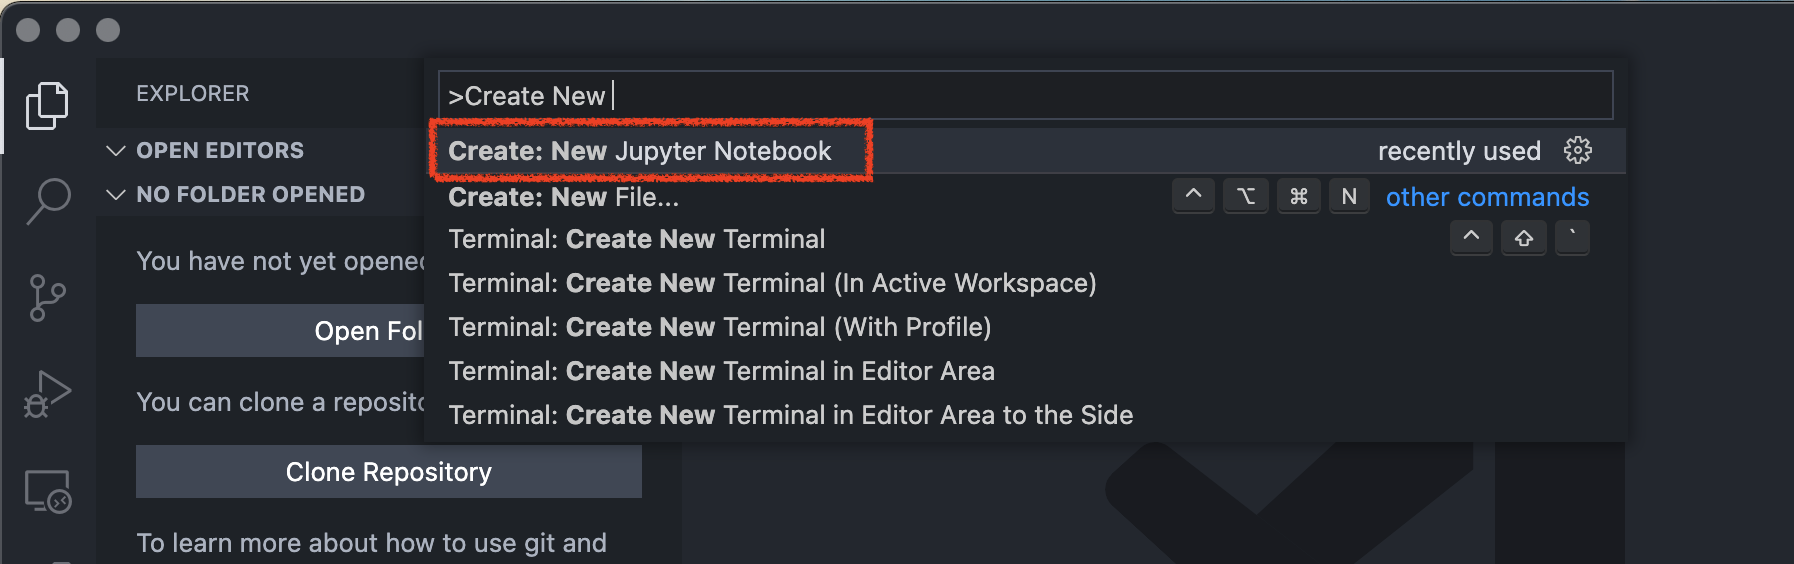
Then search Jupyter: Create New Jupyter Notebook from Command Palette:
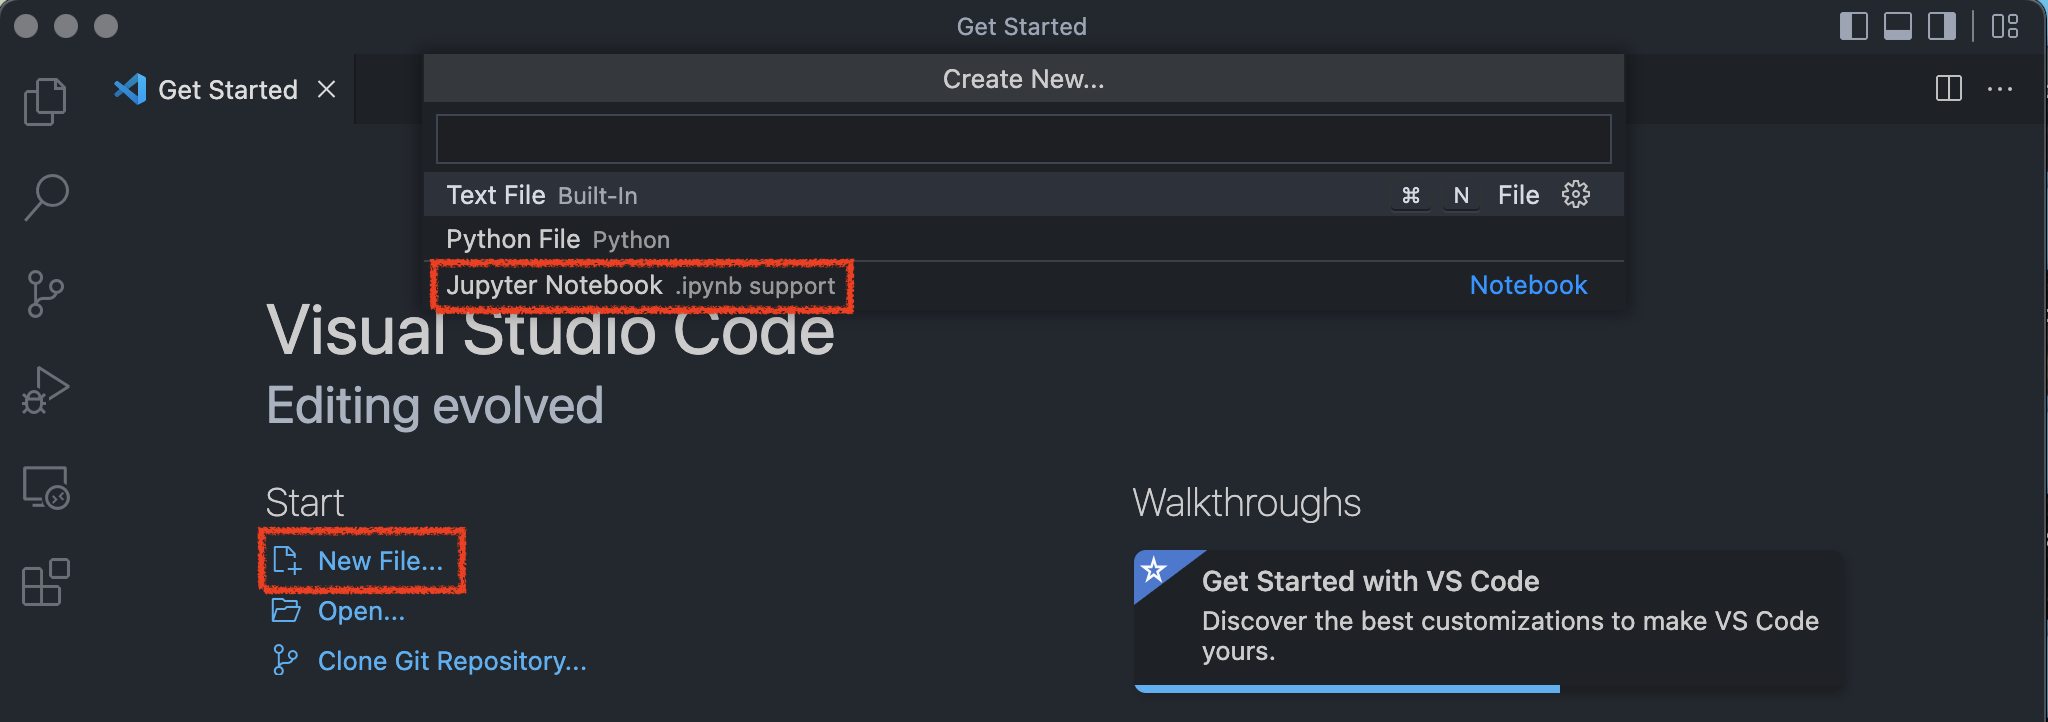
Or click New File then choose Jupyter Notebook .ipynb:
On the created Jupyter Notebook, click Seletc kernel in the top right to select an environment:

Here we choose Python 3.10.4:

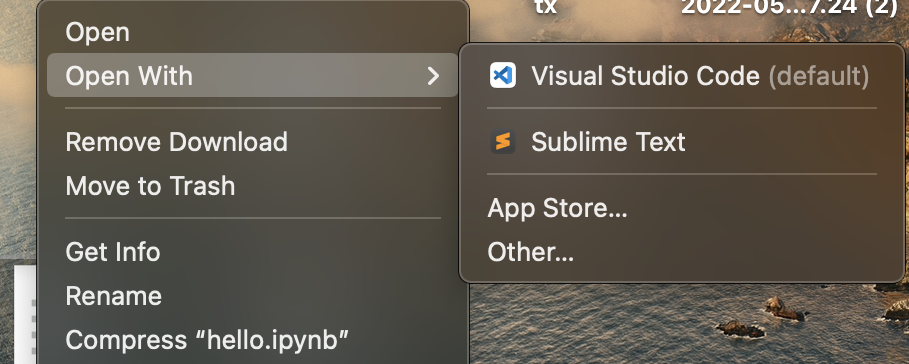
If you have an existing Jupyter Notebbok file, you can open it by right-clicking on the file and open with VS Code.
CLICK HERE is the link to Jupyter Notebook file hello.ipynb, you can download and try to open it.
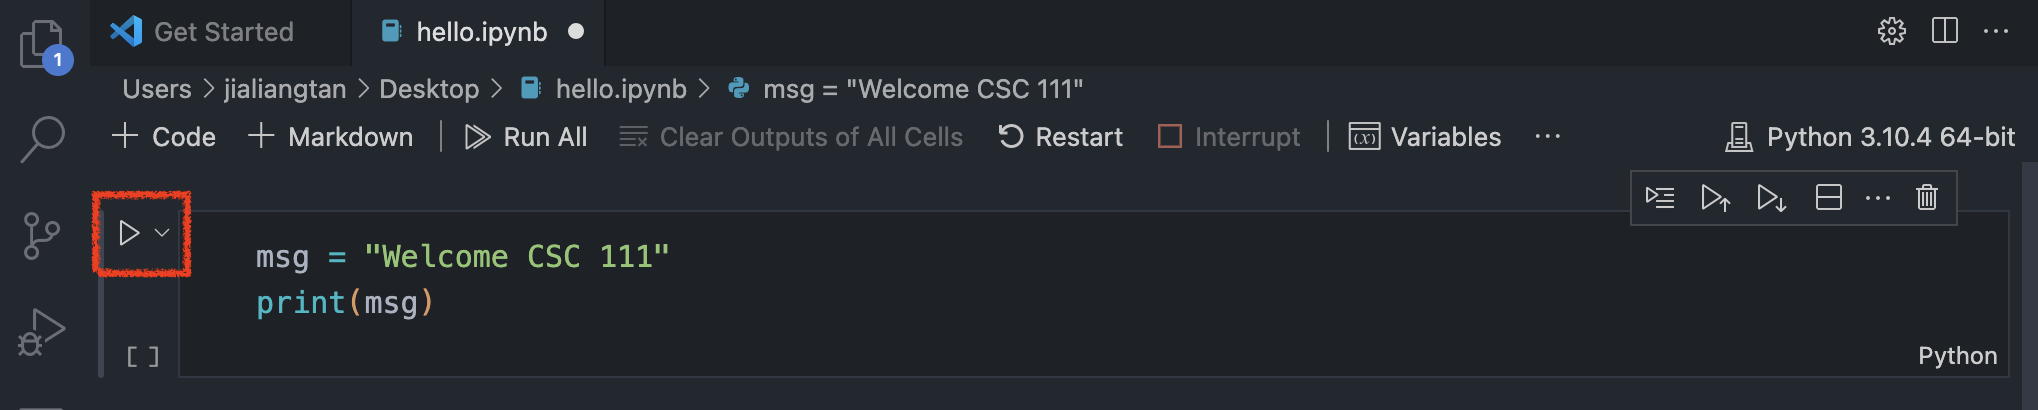
Step 3: Run single code cell
Once you have a Notebook, you can run a code cell by clicking the Run icon to the left of the cell.
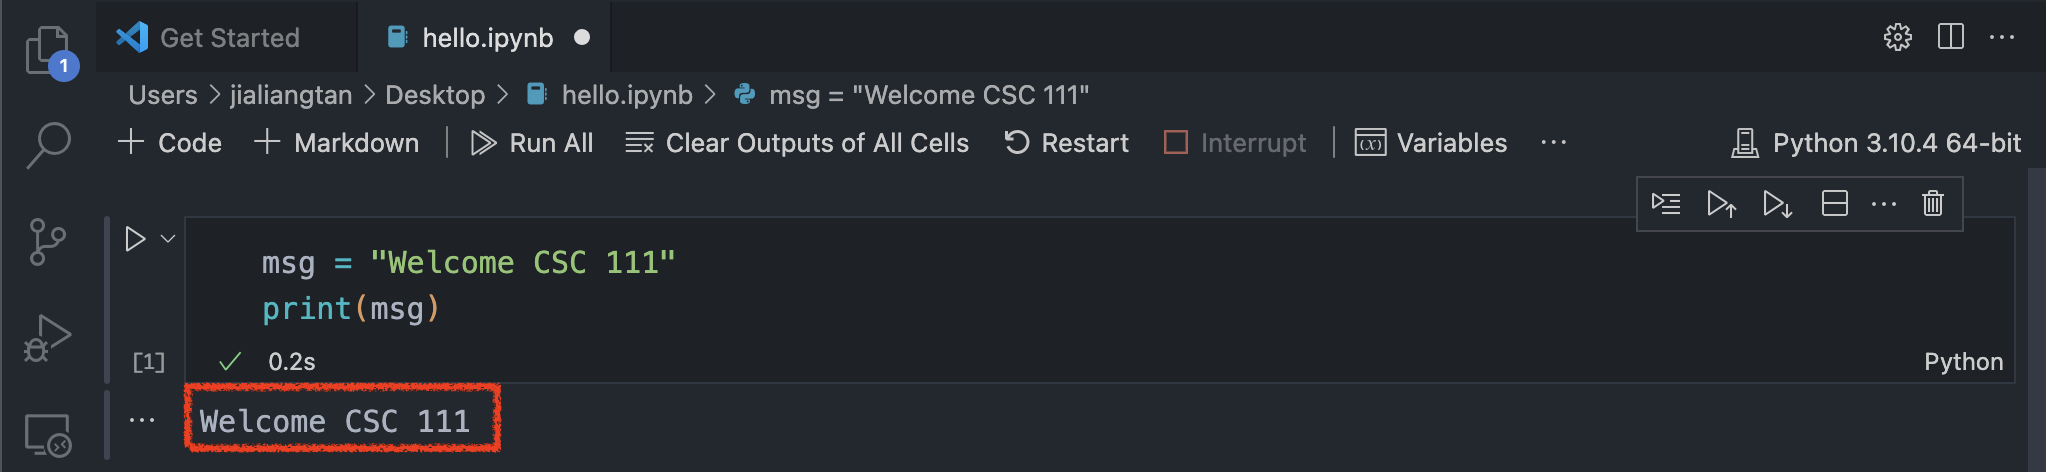
 The output will appear directly below the code cell:
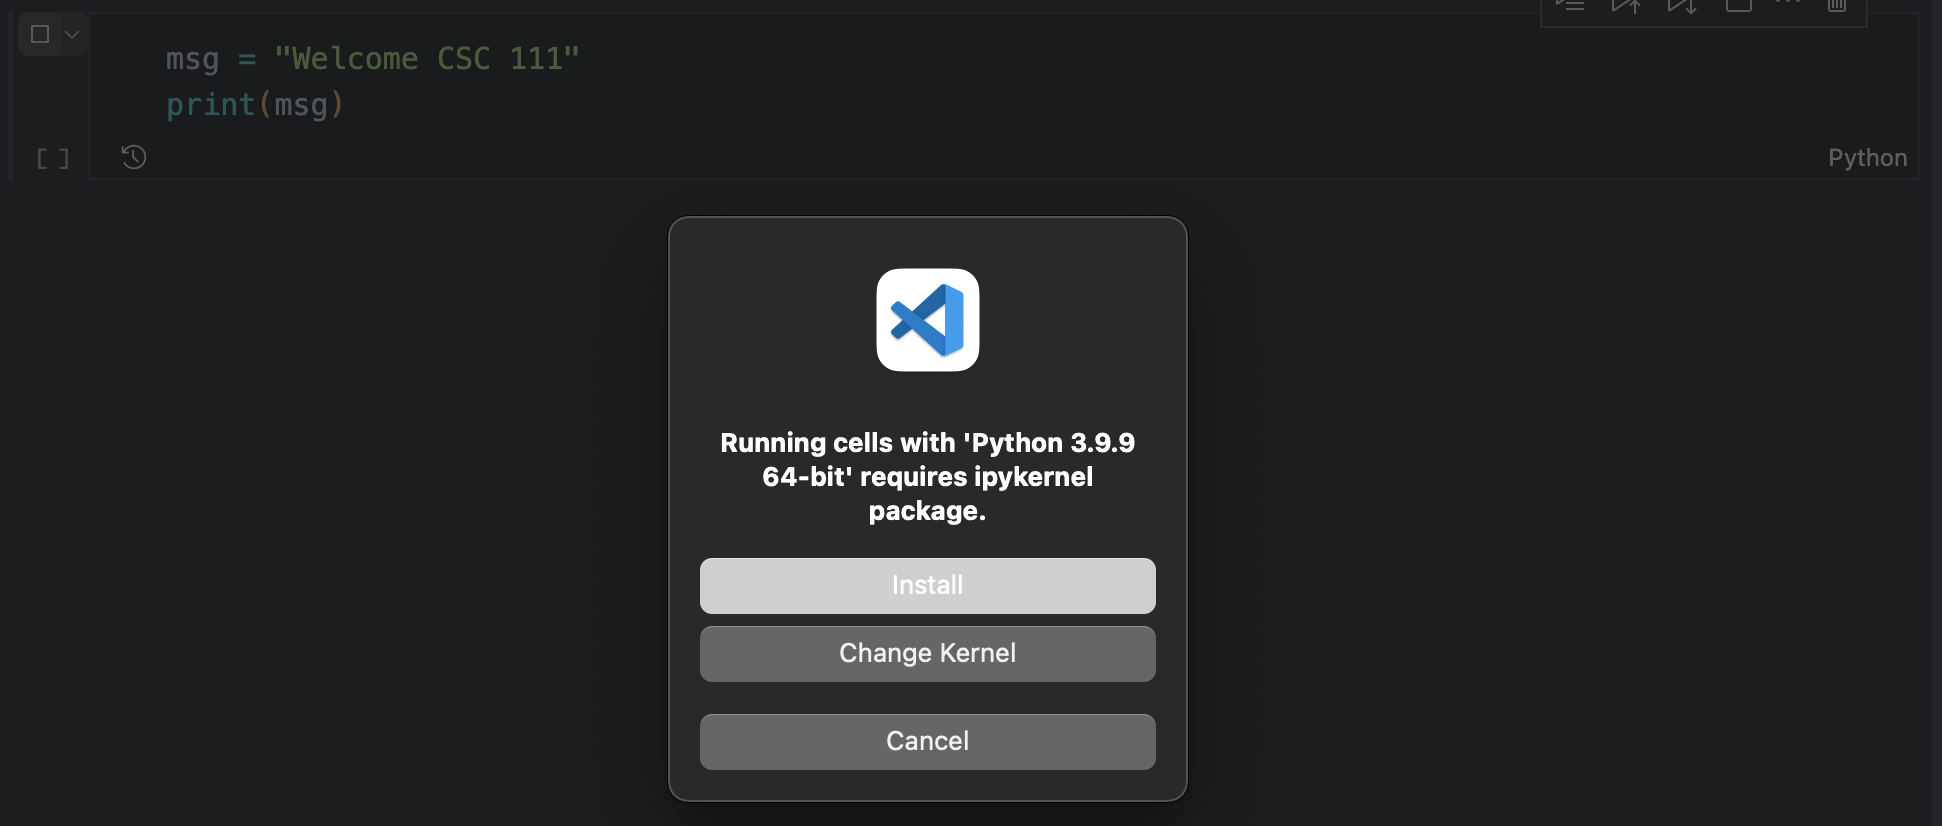
It may ask you to install the ipykernel package of your Python version, just click install, it will automatically install for you. Once the installation finished, you can run the cell by clicking Run icon.
Step 4: Add additional code cells
Code cells can be added to a Notebook using the main toolbar, a cell’s add cell toolbar (visible with hover):
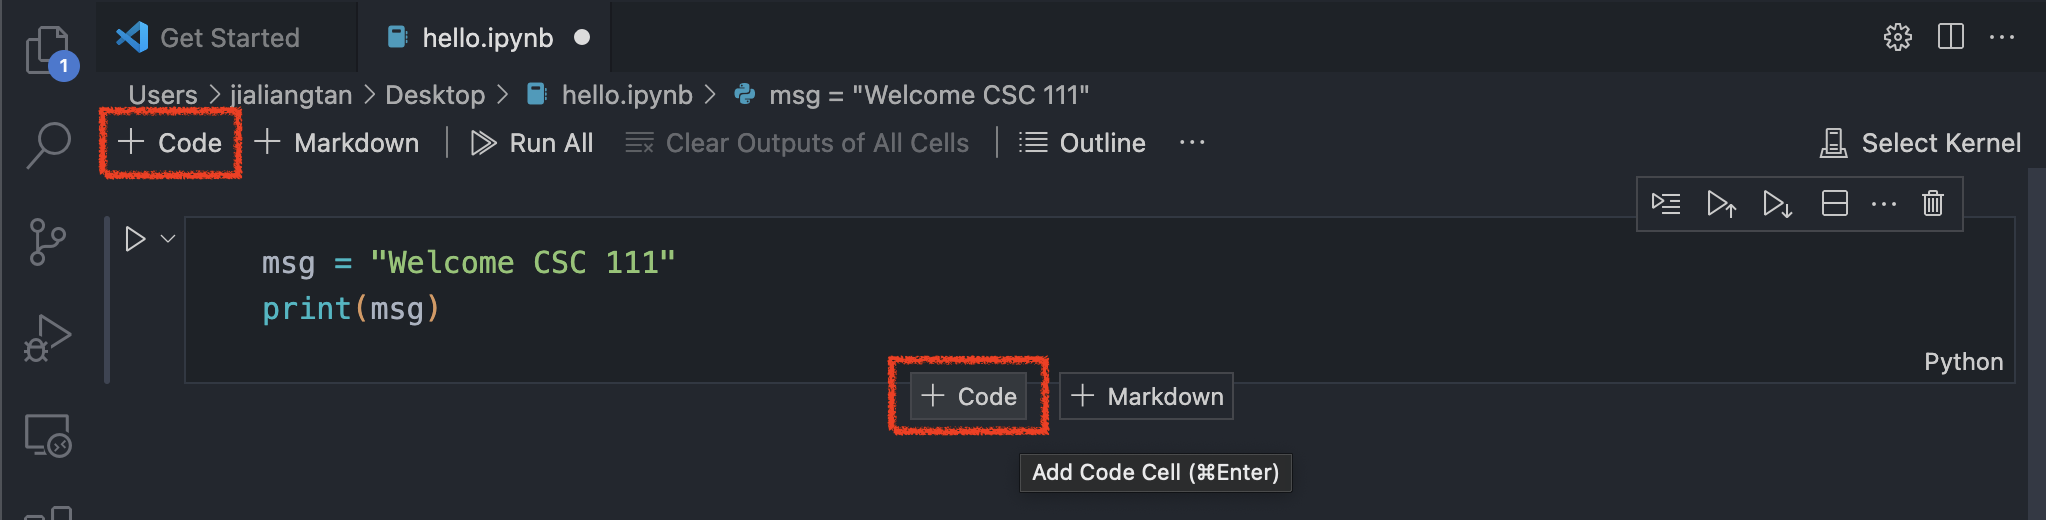
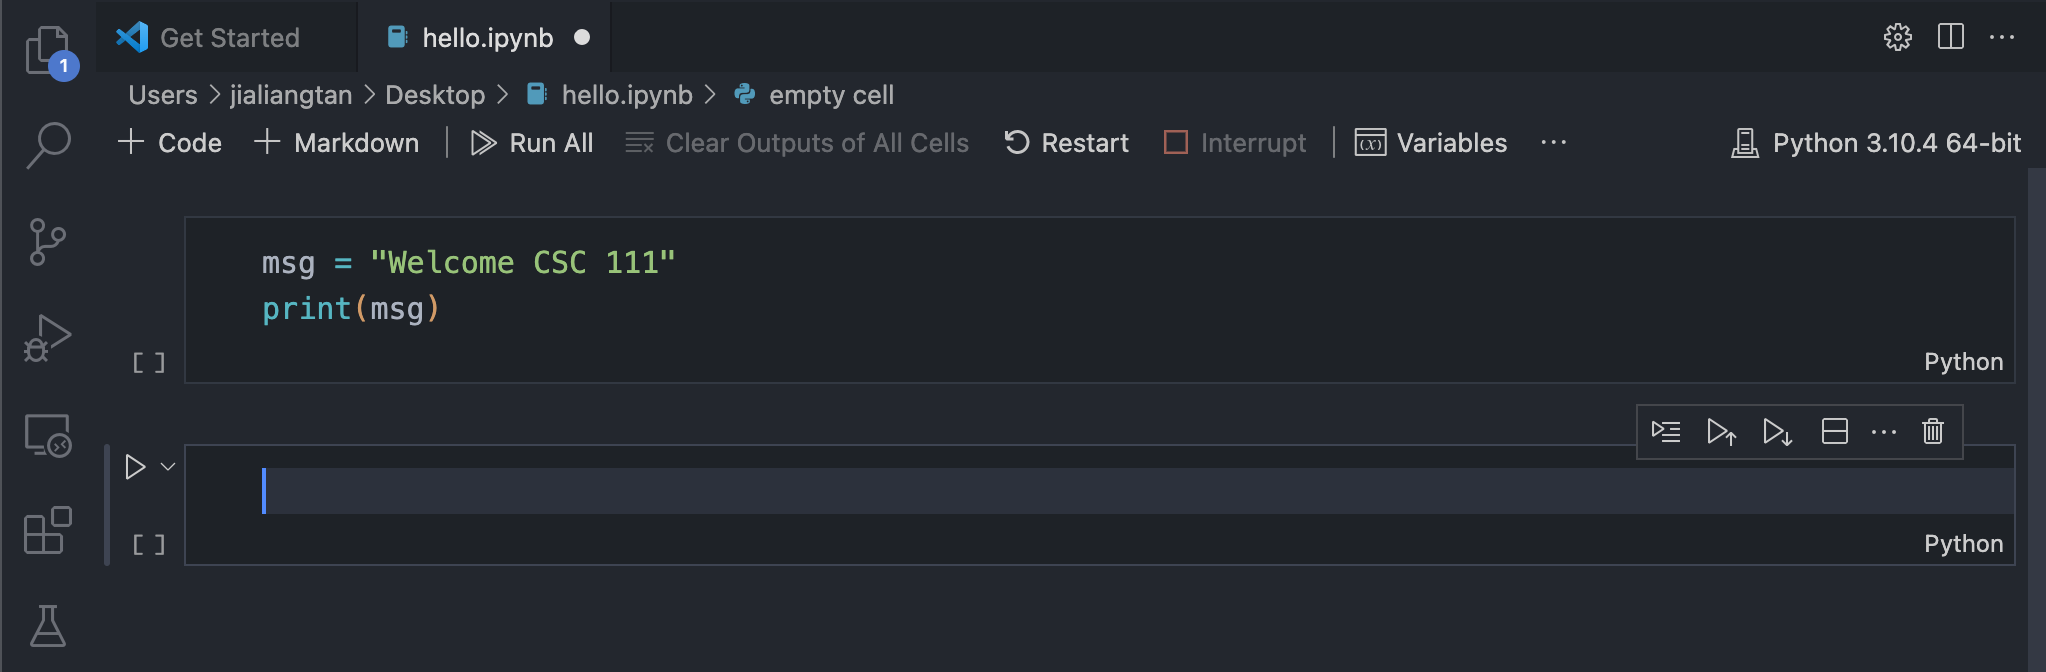
Click any + Code will add a new cell directly below the current selected cell.
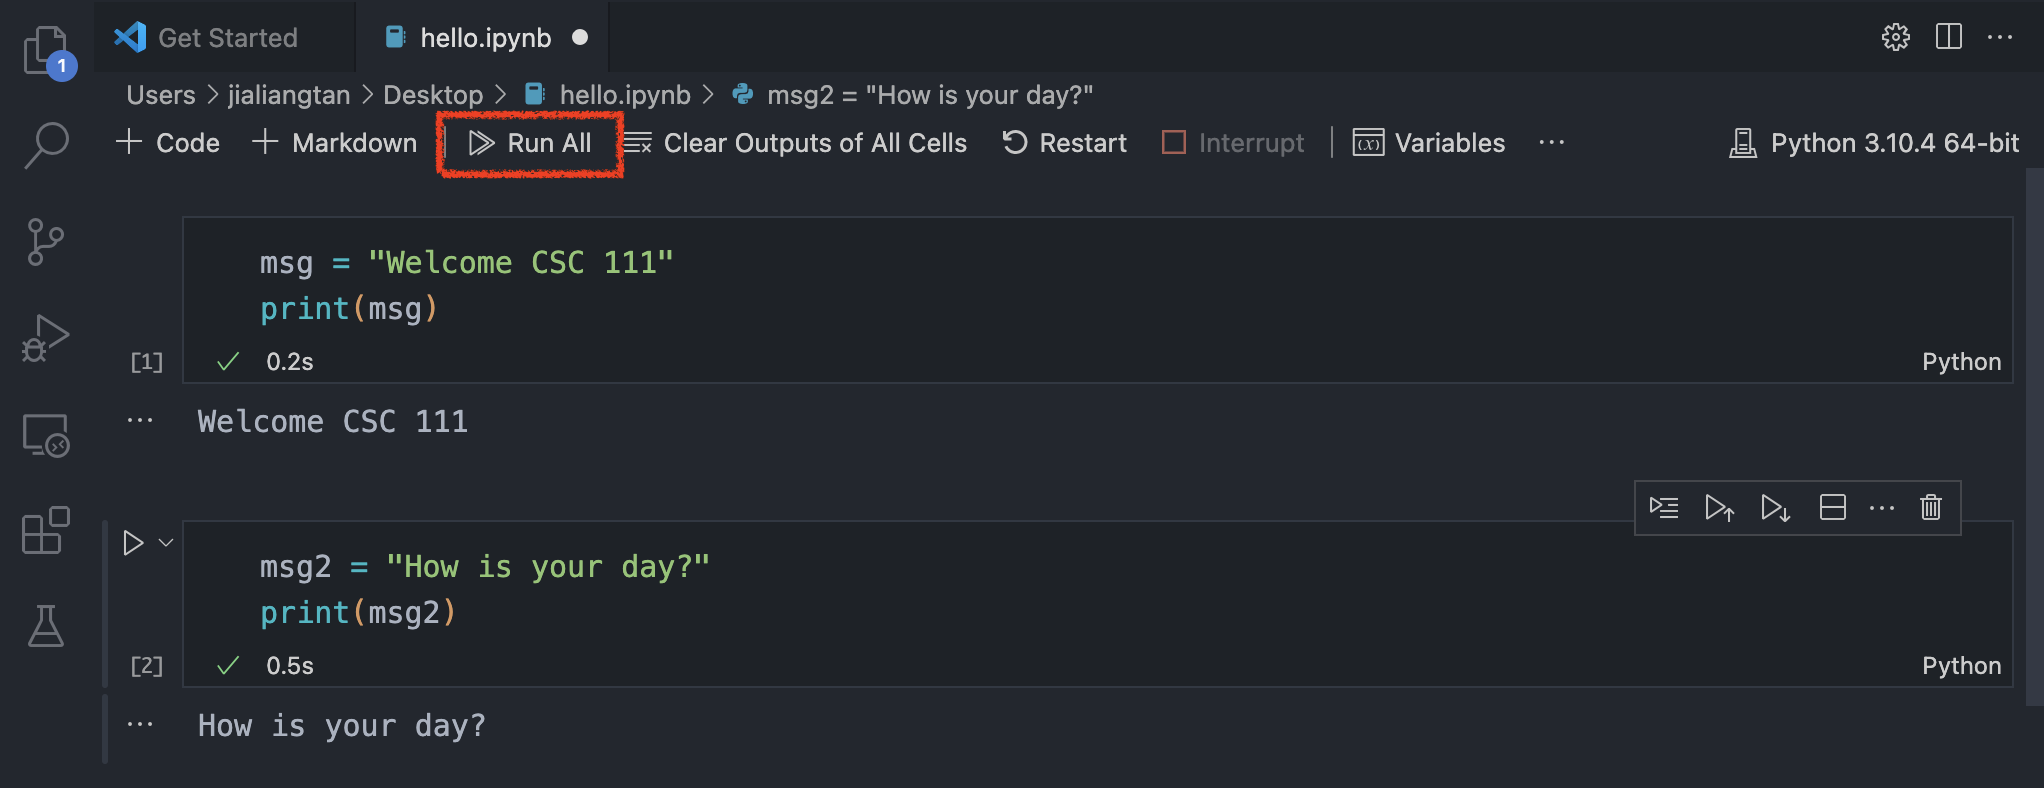
Step 5: Run multiple code cells:
We can run all code cells together by clicking Run All, then the results of every cell will be displayed under the cells: