In this tutorial, you will learn how to download and install Python on macOS.
Step 1: Check Python
First step we need to check if Python is already installed on your laptop. If you are working on a cluster, skip this step, we have taken care of everything.
We can check it via terminal.
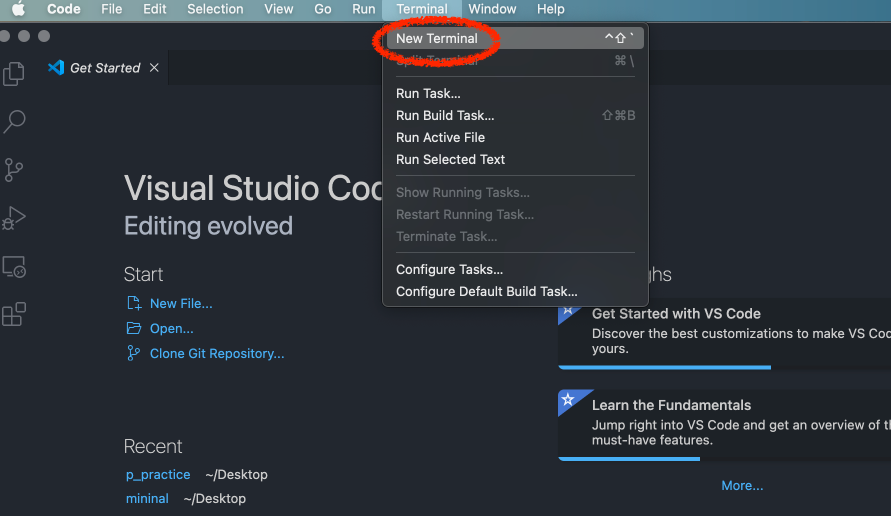
First, on your VS Code, click Terminal > New Terminal from top menu to open a new terminal:
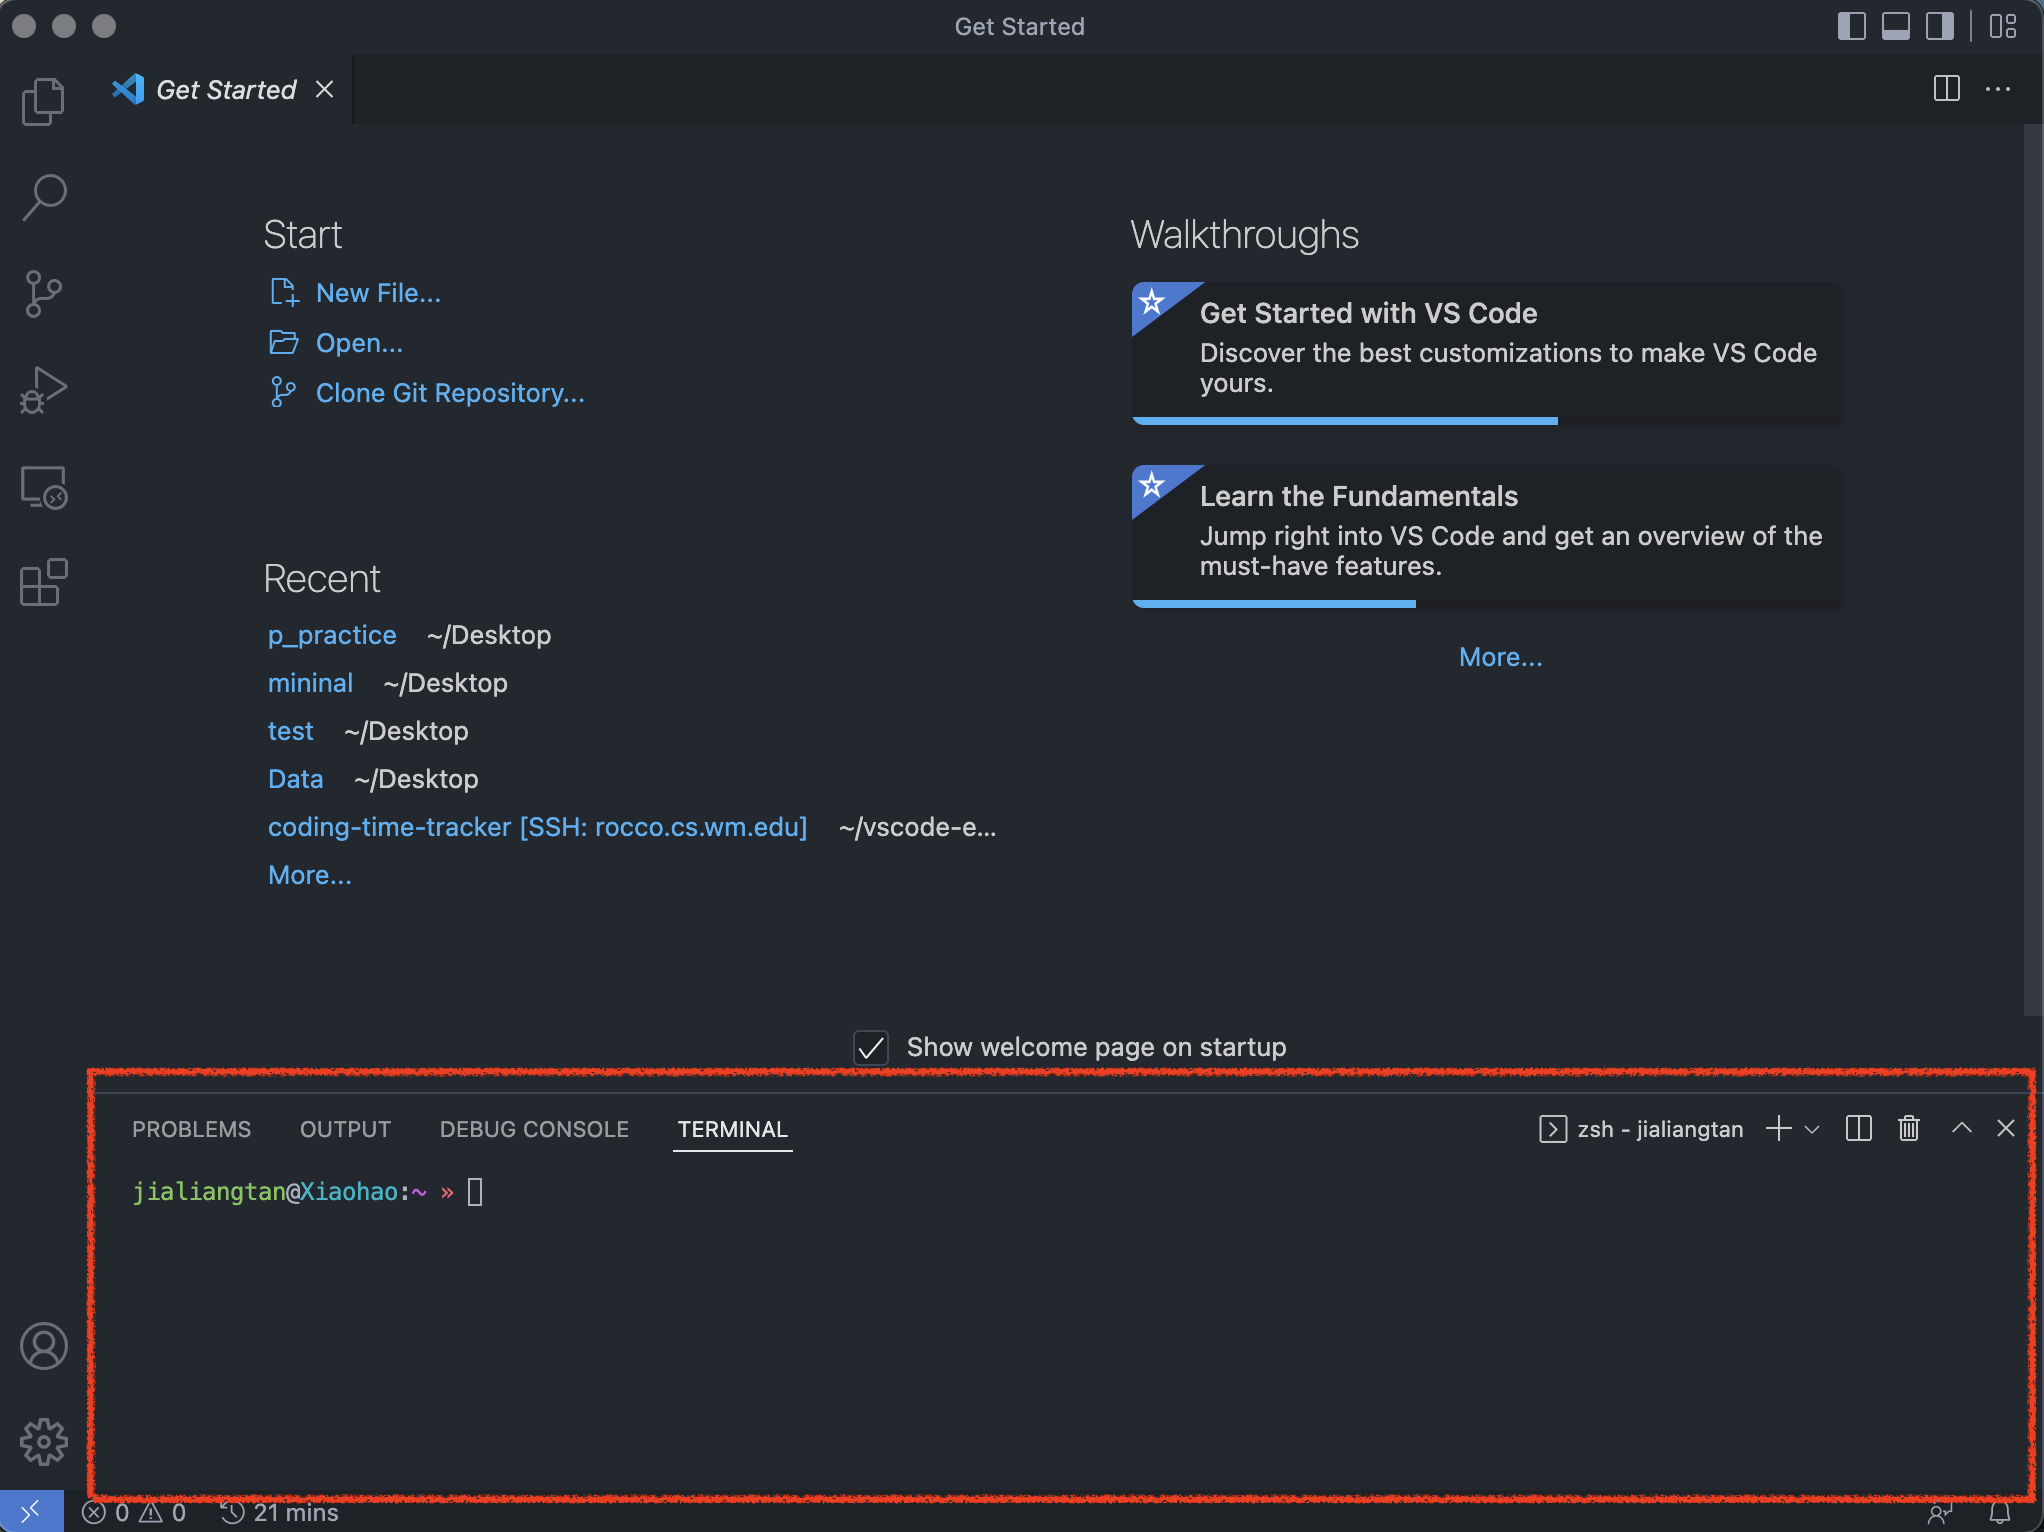
Below red box is the new terminal we just opened. You will see both your name and your device name from the terminal, as you can see jialiangtan is my name, and Xiaohao is my laptop name.
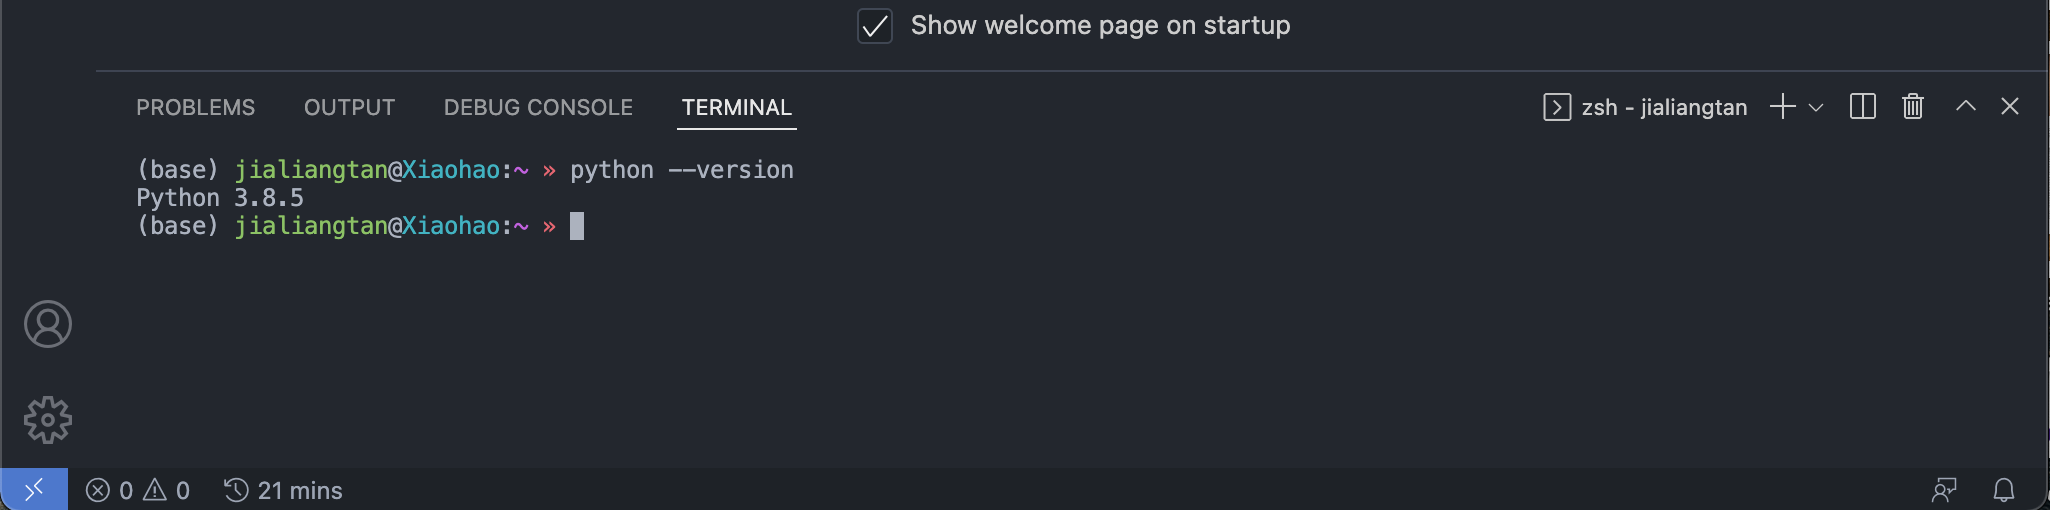
Now we have a terminal, let’s check if you have installed Python. Type following command in your terminal and hit enter:
$ python --version
You may see:
$ python --version
-bash: python: command not found
Which means you don’t have Python installed.
Or you may see:
$ python --version
Python 2.x.xx
Which means you have Python2 installed. Python2 is outdated, it uses an older syntax for the print function, you need to install Python3 for our class.
If you see:
$ python --version
Python 3.x.x
Great, you have Python installed! You can skip the rest steps.
We will install the newest Python 3.10.4 on step 2. If you have some older versions of Python3 installed (personally I have Python version 3.8.5 installed), that’s totally fine.
 It doesn’t matter what version of Python3 you installed, as long as it is Python3.
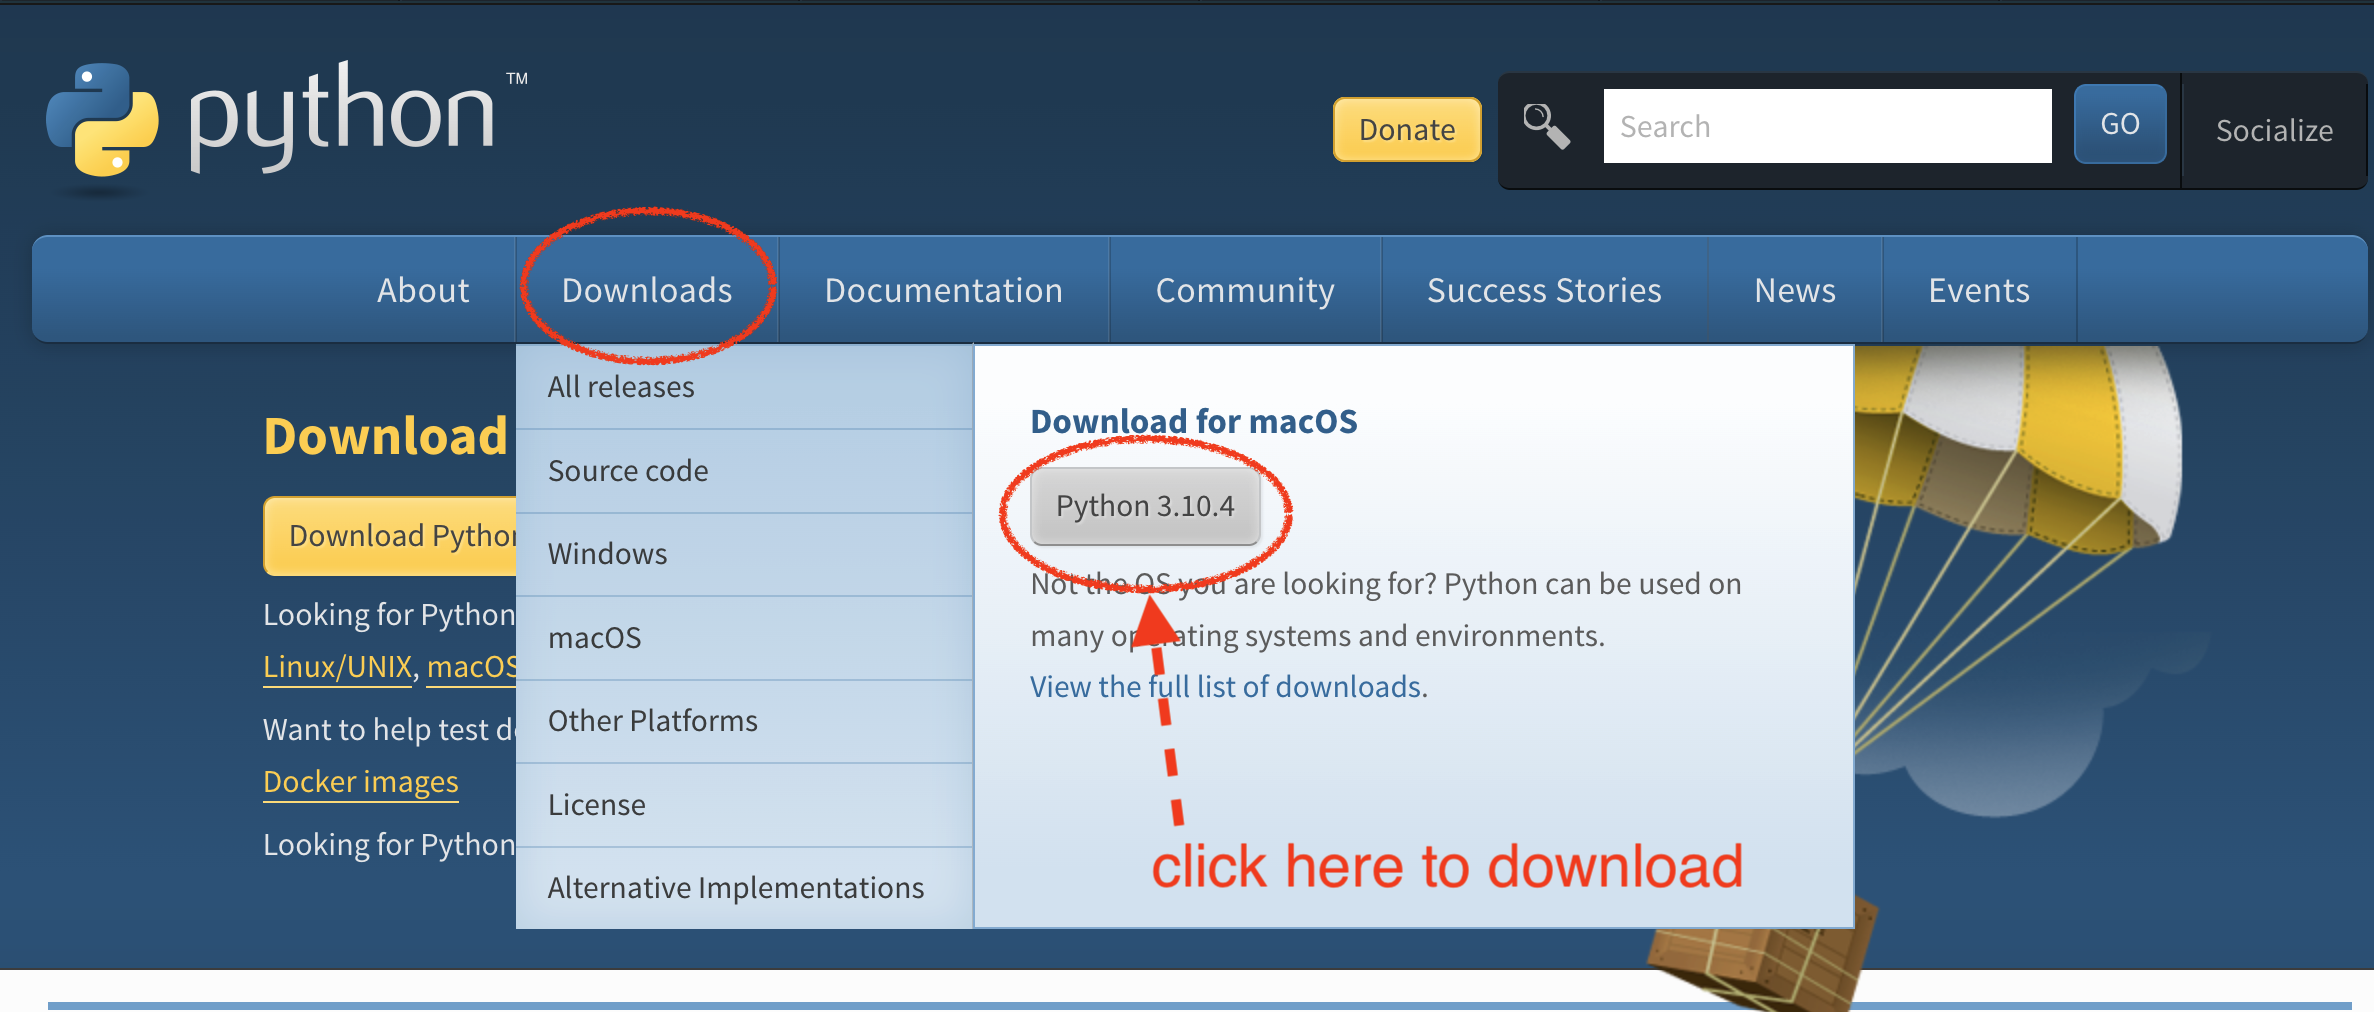
Step 2: Download Python
Quick Link: click HERE to download for macOS
Or, visit Python Homepage python.org to download and install Python.
Choose the newest version of Python package to download (as of in May 2022 the newest Python is version 3.10.4):
Step 3: Install Python
Launch install package that you downloaded in step 2.
Click continue to install:

Agree with the license and click continue:

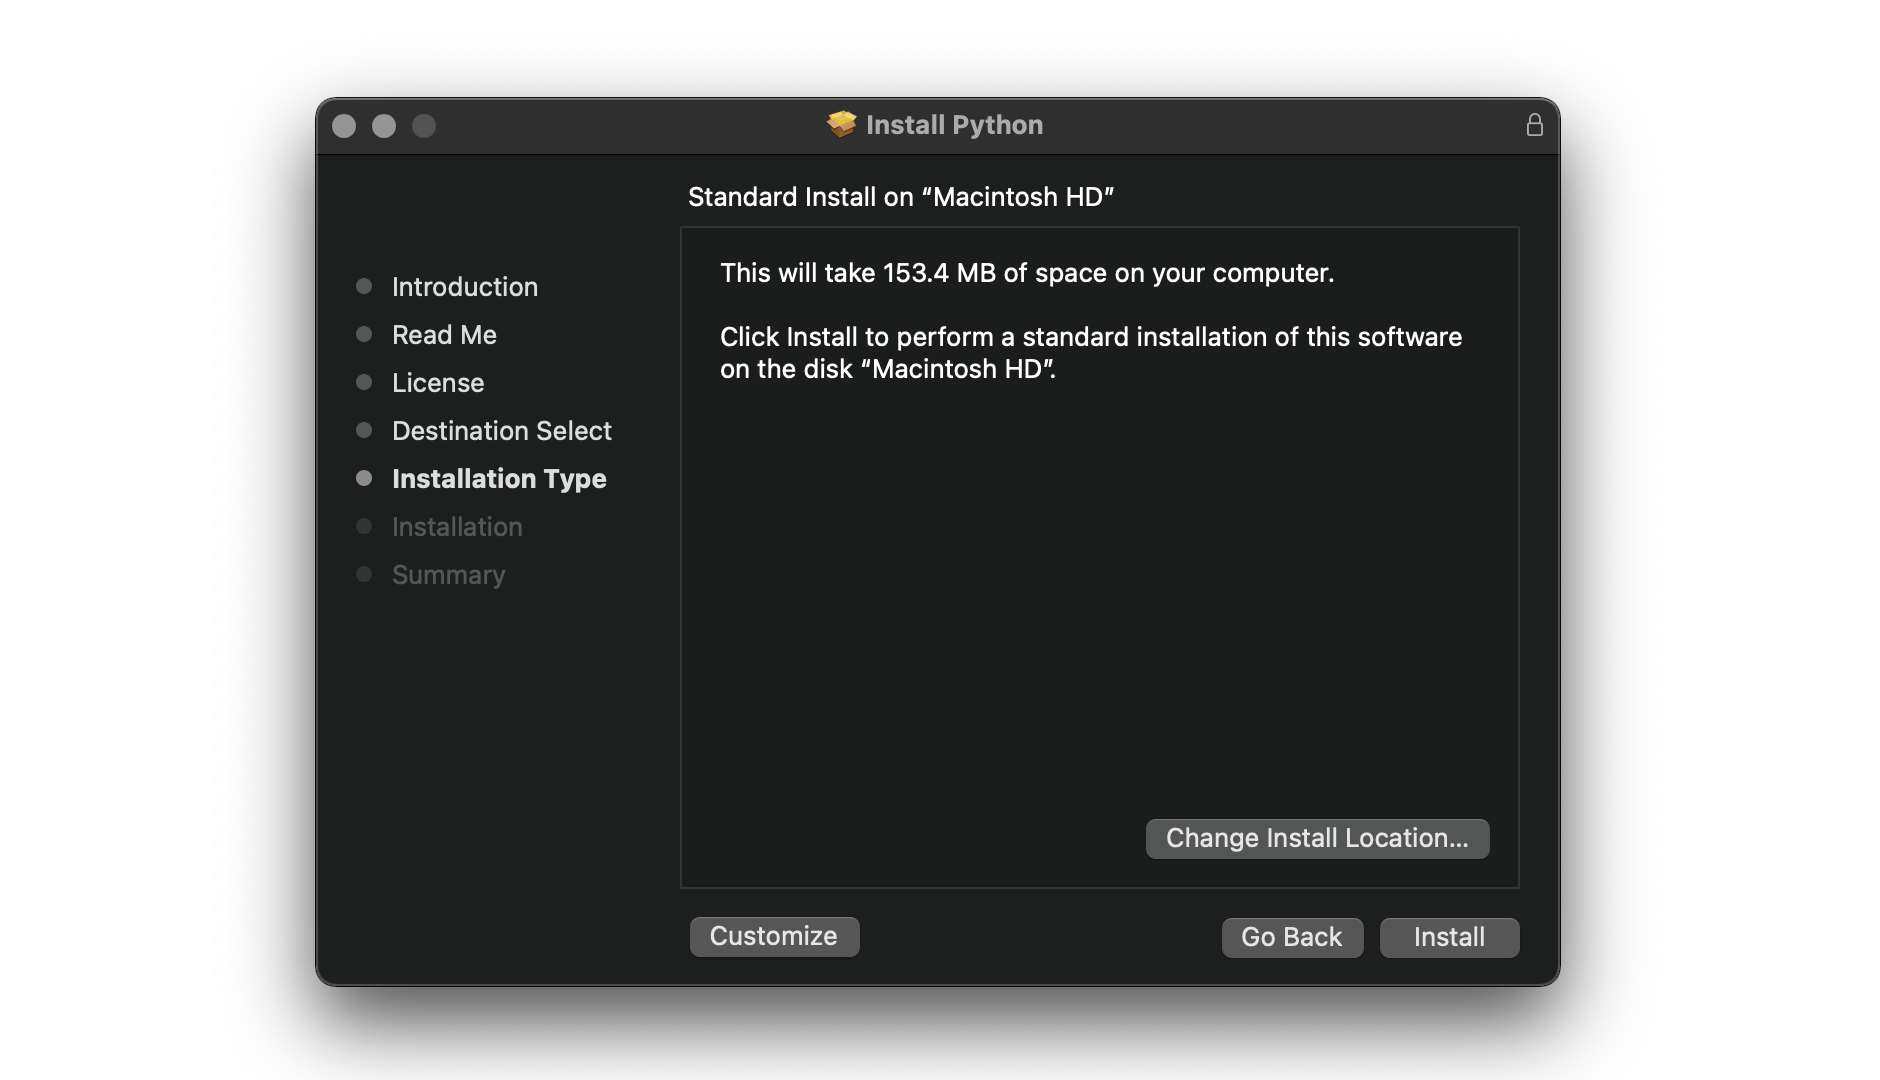
Click install to install by default (it will ask your password to install):
When the installation is done, you will be noticed “Python 3.10.4 was successfully installed!”, then you can keep or move the Python Installer to the trash.
Now you should be able to find the Python 3.10 in your Application folder.
Step 4: Validate Python
To validate Python 3 you just installed, let’s open a new terminal from VS Code (in Step 1).
And type the following command in your terminal and hit enter:
$ python --version
Now you should be able see the Python version that we just installed.
$ python --version
Python 3.10.4
!!!Note: If you have Python 2 pre-installed, python --version command may still trigger your pre-installed python2, try python3 --version. You can set python3 as a default python version by creating a symbolic link, we will talk this in future tutorial.